|

Tutorial 8: Step 7 Perform F-Test and View Results
1. If the new complete Estimated: #mv <2 | nn=5 | Euclid dataset in the Experiments navigator is not already highlighted, click it.
2. Select ANOVA from the Statistics menu. The ANOVA dialog is displayed.
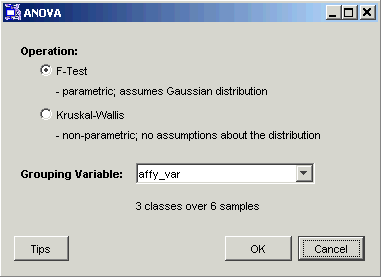
The Operation is set to F-Test.
The Grouping Variable is set to affy_var.
3. Click OK. The F-Test is performed and a new F-Test: affy_var dataset is added to the Experiments navigator.
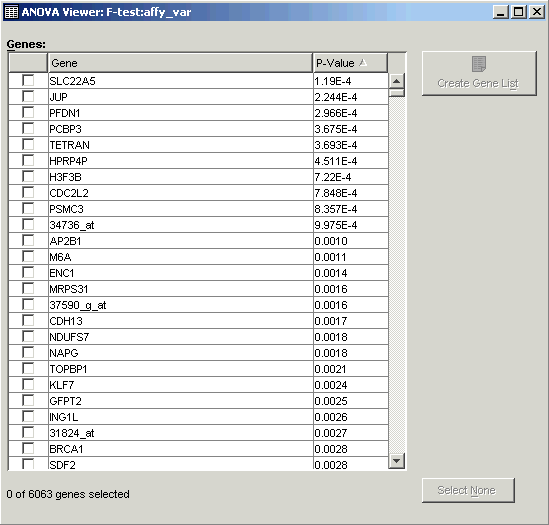
4. If you have automatic visualizations enabled in the user preferences, the ANOVA Viewer is displayed. If not, double-click the new F-Test: affy_var dataset in the Experiments navigator to display the ANOVA Viewer.
In step 3 of this tutorial, you set the gene display name to gene name in your user preferences. The gene names are what you currently see in the ANOVA Viewer. In this step you will change the gene display name setting to see Affymetrix gene identifiers displayed in the ANOVA Viewer.
5. Click the ![]() icon in the upper right
corner of the ANOVA Viewer to close it.
icon in the upper right
corner of the ANOVA Viewer to close it.
6. Select Preferences from the Tools menu. The User Preferences dialog is displayed.
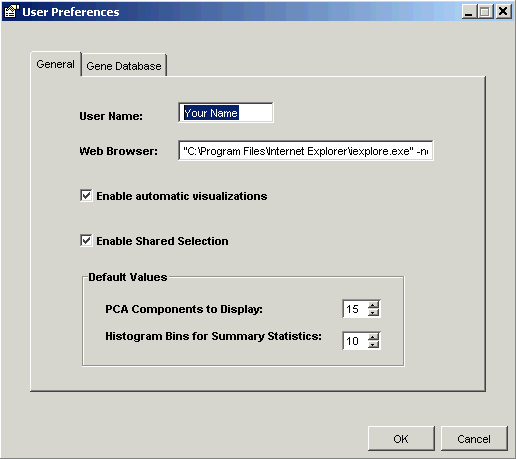
7. Click the Gene Database tab. The Gene Database pane is displayed.
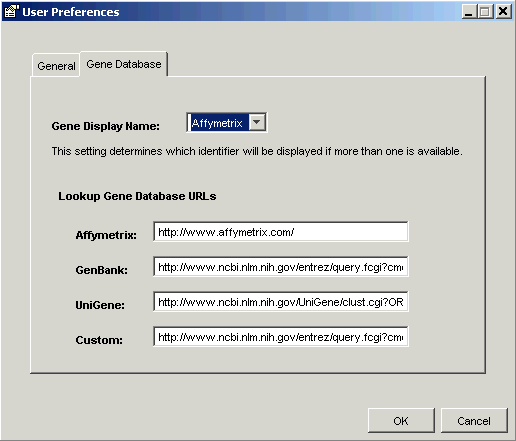
8. Set the Gene Display Name to Affymetrix.
9. Click OK. Your preferences are updated.
10. Double-click the new F-Test: affy_var dataset in the Experiments navigator. The ANOVA Viewer is displayed.

11. Click the first gene checkbox. The gene is highlighted and a checkmark appears in the checkbox.
12. Press and hold down the <Shift> key and scroll down until you see the p-value 0.0497 (gene 34378_at).
13. Click the checkbox for gene 34378_at. All the genes from the first to that gene are highlighted and checked. Release the <Shift> key.
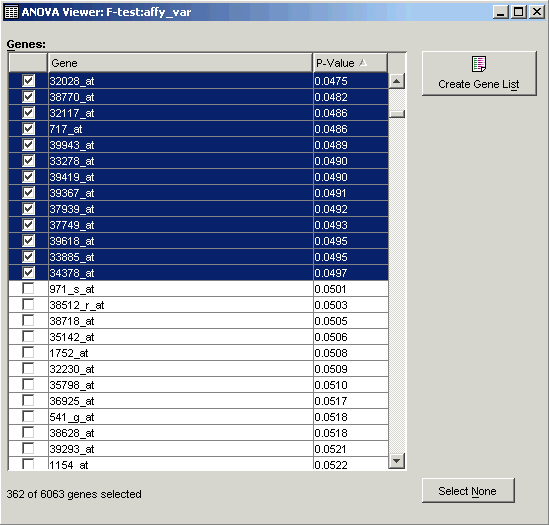
14. Click Create Gene List. The Create Gene List dialog is displayed.
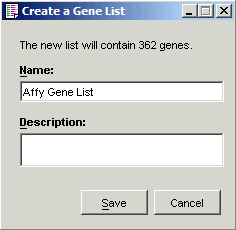
15. Type Affy Gene List into the Name text box. Optionally, you may type in a description.
16. Click Save. The gene list is created and is added to the Gene Lists navigator.
17. Click the ![]() icon in the upper right
corner of the ANOVA Viewer to close it.
icon in the upper right
corner of the ANOVA Viewer to close it.