|


Tutorial 3B: Step 3 Create a Matrix Tree Plot
If the matrix tree plot is already displayed, there is no need to re-create it. Read the sections below the image for information about the plot.
Create a Matrix Tree Plot
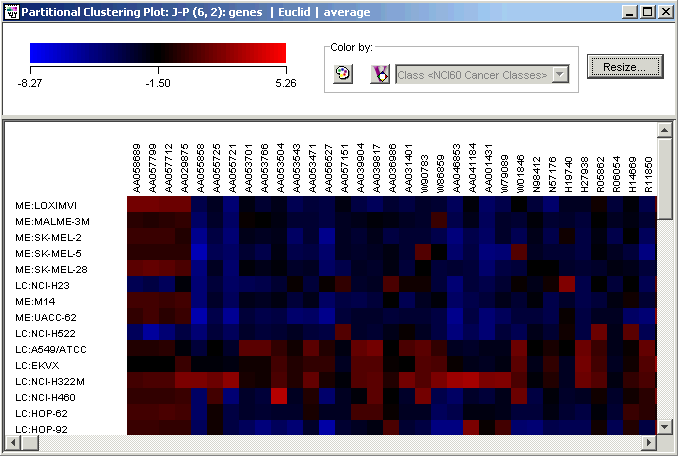
1. Double-click the J-P (6,2) genes | Euclid | average experiment in the Experiments navigator. The item is highlighted and a matrix tree plot is displayed.
OR
1. If the J-P (6,2) genes | Euclid | average experiment in the Experiments navigator is not already highlighted, click on it.
2. Click the Matrix
Tree Plot toolbar icon ![]() , or select Matrix
Tree Plot from the Clustering
menu, or right-click the item and select Matrix
Tree Plot from the shortcut menu. A matrix tree plot of the dataset
is displayed.
, or select Matrix
Tree Plot from the Clustering
menu, or right-click the item and select Matrix
Tree Plot from the shortcut menu. A matrix tree plot of the dataset
is displayed.
Resize the plot
You can use the Resize function to reduce the size of the plot. You will still be able to identify the genes and samples associated with particular color tile by hovering the mouse pointer over the color tile and reading the tooltip which appears.
1. Click the Resize button at the top of the plot. The Resize dialog is displayed.
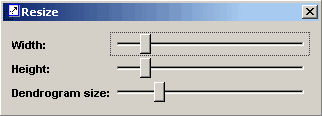
2. Reduce the height until you can see all of the samples and the clustering comb at the same time. Click the 'x' in the upper right corner of the Resize dialog to dismiss it. The reduced height causes the sample labels to not be displayed on the plot.
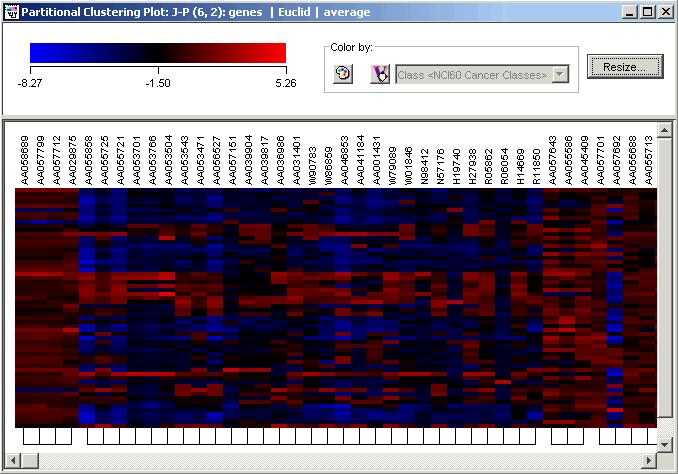
3. Click the Find toolbar icon. The Find dialog is displayed.
4. Type the gene name W47225 into the Find what box.
5. Click Find. The plot scrolls to the right so that the gene W47225 (an EST highly similar to interleukin-1 beta) is visible and highlighted.
Notice the strong resemblance between W47225 (IL1B) and its immediate neighbor W46667 (another EST), both highly overexpressed in melanoma LOXIMVI (sample 1). Also in that cluster are a number of ESTs and SIDs.
When you are finished, you can close all the open plots either by clicking on the 'x' box in the upper-right hand corner of each, or by selecting Close All from the Window menu.